Installation Guide
Before you start
This installation guide provides step-by-step instructions for assembling and installing the system correctly and safely.
Please read the entire guide before starting work. Ensure all components are present, undamaged, and that the installation area is level, clean, and suitable for fixing.
Only use the system in accordance with the manufacturer’s recommendations and structural design calculations.
What you'll need

Saw

Mallet

Level

Tape Measure

Cordless Drill
To view all components for the installation please visit the plas-shop ecommerce store.
Take me thereInstallation
Step 1
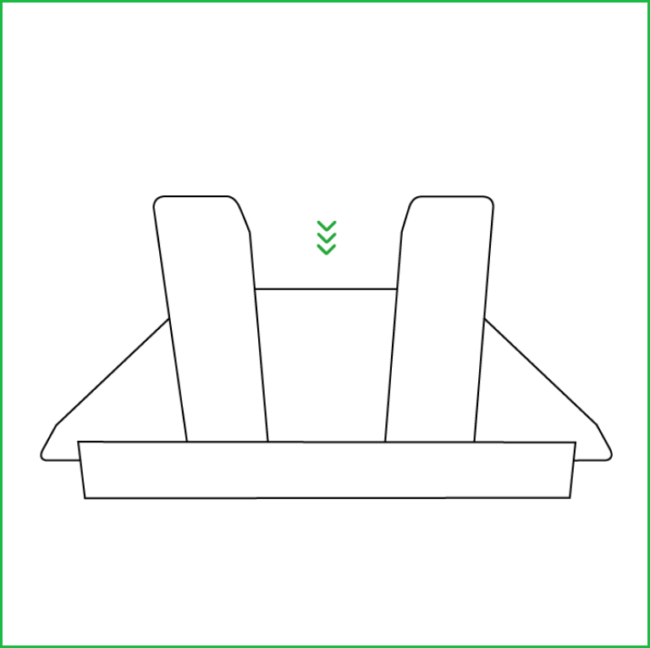
Position the baseplate at the designated starting location. The base plate is a critical component of the system, providing the primary foundation and ensuring overall structural stability.

Step 2
Install the 5-board U-track flush with the front face of the baseplate. The 5-board track is supplied in pre-cut lengths to ensure that base plates are spaced in accordance with the project’s structural design and calculation requirements.

Step 3
Position the next base plate at the end of the 5-board U-track, ensuring that the front face remains flush with the base plate. Repeat this process sequentially until a change in direction is required.

Step 4
Place a section of U-track over the male edge of the board to act as a protective buffer during installation. Using a mallet, strike the U-track evenly along the length of the board to engage the male and female profiles until they fully interlock.

Step 5
Lift the two interconnected panels and place them onto the base plates. The two vertical spigots will locate into the internal cells of the boards, holding the panels securely in the vertical position.


Step 7
Repeat the interlocking process described in Step 4 with a further two boards before lifting them into the vertical position. Once upright, connect these boards to the panels already positioned on the base plates.

Step 8
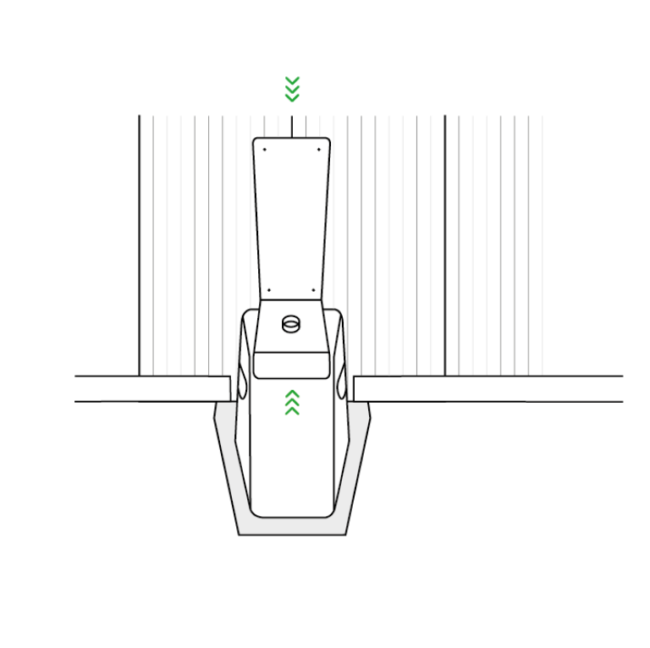
Fill the ballast bottle with the specified ballast material, which may be water, sand, or pea gravel as required. Once filled, position the ballast bottle onto the base plate.
Step 9
Secure the ballast bottle using the ballast bottle retaining bracket. Position the bracket over the bottle cap and fix it back to the panels using four 25 mm screws.
Step 10
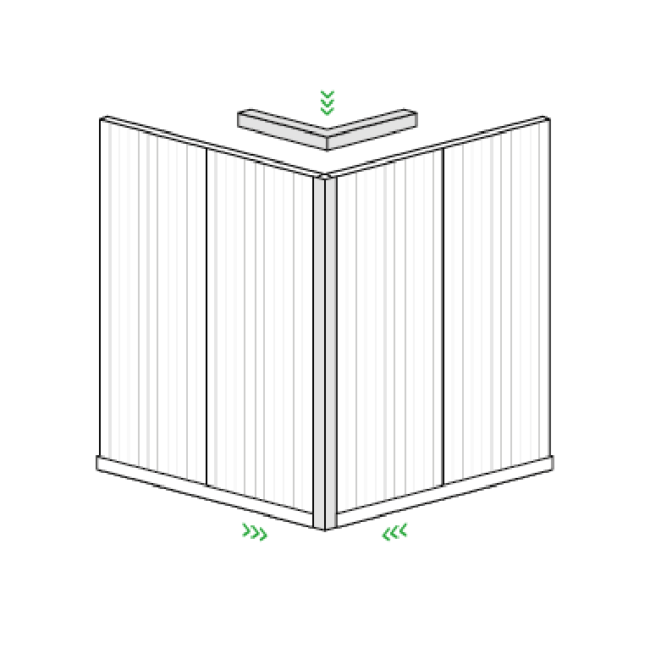
Install corner modules in the same manner as the standard panels, using the male and female compressed tongue-and-groove joint. Gently tap into position with a rubber mallet until fully engaged. Once engaged, place the steel corner reinforcement over the top of the panels and corner module to provide additional strength and rigidity.

Step 11
Slide the prefabricated door unit (single or double) into position between the installed panels, ensuring that a ballast bottle is installed on each side of the door. Place the pre-cut over-door boards above the door opening and use a mallet to engage the male and female joints as with the standard boards. Then slide the pre-cut, notched door board attachment onto the door and continue installing the remaining boards and supporting components as required.

Get in touch
Get a quote today
Do you require the best hoarding solution for your hoarding construction project? We’re here to help support you from start to finish, whether it is large or small, we will find the best hoarding construction solution for you.
Get a quote